


Being a developer, styling your web pages every time using CSS can be difficult and frustrating. Well to solve this problem there are prominent frameworks present like Vanilla CSS3, LESS, SCSS, Bootstrap, Tailwind CSS, styled components, and more.
While Tailwind has been around for a while now, you might not have come across it yet or might have just heard about it, or you don't know whether learning this new technology related to CSS is going to make your development easier.
I hope this article will be of great help to you in understanding Tailwind CSS.
Introduction
Tailwind CSS, as per their website is a "utility-first CSS framework" that provides several opinionated, single-purpose utility classes that developers can use directly inside the markup to design an element.
Some of the utility classes frequently used these days are:
flex: Used to apply Flexbox to a
<div>items-center: to apply the CSS property
align-items: center;to a<div>rounded-full: to make an image circular, and so on
Seriously, I can't list all of them as there are so many of these utility classes. But the best part is, we do not have to write these utility classes ourselves and keep them in any global CSS file. We directly get them from Tailwind.
You can also visit their documentation page to get the list of all the utility classes Tailwind offers if you are using VS Code for your development then install an extension called Tailwind CSS IntelliSense and it gives you auto-suggestions as you keep typing the utility classes, as shown in the image below.

Setup Tailwind CSS
There are various ways you can set up Tailwind CSS for your next project. It works smoothly with HTML and lots of frontend frameworks like Next, React, Angular, etc.
There are two ways to use Tailwind CSS we can install them on our server or we can use the CDN link as well.
Method 1: Install Tailwind via npm
Step 1:
npm init -yStep 2:
npm install tailwindcssStep 3: Use the @tailwind directive to inject Tailwind's base, components, and utility styles into your CSS file.
  @tailwind base;
  @tailwind components;
  @tailwind utilities;
Step 4: This is used to create a config file to customize the designs. It is an optional step.
npx tailwindcss initStep 5: This command is used to compile style.css is the file that has to be compiled and output.css is the file on which it has to be compiled. If the file output.css is not created earlier then it will automatically be created.
npx tailwindcss build styles.css -o output.cssMethod 2: Using Tailwind via CDN
<link href="unpkg.com/tailwindcss@^1.0/dist/tailwind.min.css"rel="stylesheet">
Limitation of Tailwind: There are some limitations when CDN is used. Some of them are:
Example
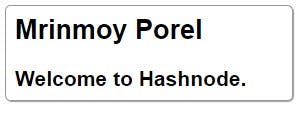
Let's look at a simple example that illustrates the different approaches taken by Tailwind CSS. Here's a simplified "profile card" element:
HTML
<div class="profile-card">
  <h2>Mrinmoy Porel</h2>
  <h3>Welcome to Hashnode.</h3>
</div>
CSS
.profile-card {
  font-family: Arial, sans-serif;
  border: 1px solid #999999;
  width: 16rem;
  padding: 0.5rem;
  border-radius: 5px;
  box-shadow: 1px 1px 1px #999999;
  box-sizing: border-box;
}

.profile-card h2 {
  margin: 0;
}

.profile-card h3 {
  margin-bottom: 0;
}
The result will look something like this:
Now we'll make the same profile card using Tailwind.
Using Tailwind CSS
  <div class="border border-gray-600 rounded w-64 shadow p-2">
    <h2 class="text-2xl font-bold">Mrinmoy Porel</h2>
    <h3 class="text-lg font-bold mt-4">Welcome to Hashnode</h3>
  </div>
With Tailwind, there is no CSS for us to write. We just use the provided utility classes. The result looks very similar:

Here is an explanation of some of the utility classes that were used in the above HTML:
bordersets aborder-widthof1px.border-gray-600sets the border color with color from Tailwind's built-in palette.roundedsets aborder-radiusof0.25rem.w-64sets awidthof16rem.shadowsets abox-shadow.p-2sets apaddingof0.5rem.text-2xlsets afont-sizeof1.5rem.text-lgsets afont-sizeof1.125rem.font-boldsets afont-weightofbold.mt-4sets amargin-topof1rem.
Controlling the bundle size
Tailwind is typically used with a tool like PostCSS. Tailwind CSS is provided as a PostCSS plugin.
If you take a look at the Tailwind documentation, you will see that there are a lot of utility classes. There are multiple classes defined for each possible value of each supported CSS property. As you might imagine, this can result in a very large CSS file. And the size would be wasted, as the vast majority of the utility classes aren't even used.
To address this, Tailwind uses PurgeCSS under the hood. It looks at your HTML to figure out which of its utility classes you are using and removes the unused classes from the resulting bundle.
If you dynamically set class names in JavaScript, either with vanilla JavaScript or a library like Vue, you can also scan those source files for class names to make sure the final bundle contains all the classes you need and nothing else. You can configure which files are checked in the Tailwind configuration file:
module.exports = {
  purge: [
    './src/**/*.html',
    './src/**/*.vue'
  ]
};
Advantages
No more silly names for CSS classes and Ids.
Minimum lines of Code in CSS file.
We can customize the designs to make the components.
Makes the website responsive.
Makes the changes in the desired manner.
CSS is global and if make changes in the file the property is changed in all the HTML files linked to it. But with the help of Tailwind CSS, we can use utility classes and make local changes.
Conclusion
Tailwind CSS is a utility-first CSS framework which means we can use utility classes to build custom designs without writing CSS as in the traditional approach. Instead of writing a long disorganized stylesheet, you can use well-defined, well-documented building block classes to create the exact look and feel you need.
Thanks for reading! I hope you enjoyed reading about Tailwind CSS in this article and found it useful.
Do consider sharing it with your friends, I'd appreciate that. Follow me on LinkedIn and Twitter and stay tuned for more amazing content. Happy Coding! 🖖